Super efficient in-the-field SLR photography workflow

You are probably reading this because you take multiple photos of each scene and situation to make sure at least one will turn out sharp and well exposed…. Well I do!

Modern cameras have huge memory cards; 128GB isn’t uncommon. While this is very convenient it also creates massive amount of unnecessary data.

You end up with hundreds of photos (if not thousands) while “in the field” or any other situation without access to a computer to offload the photos.

This could be while on a holiday, on a multi-day shoot or if you simply don’t want to transfer all those photos only to delete them shortly afterwards.

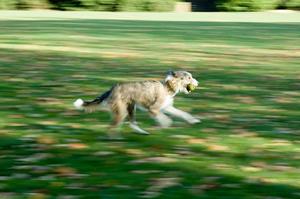
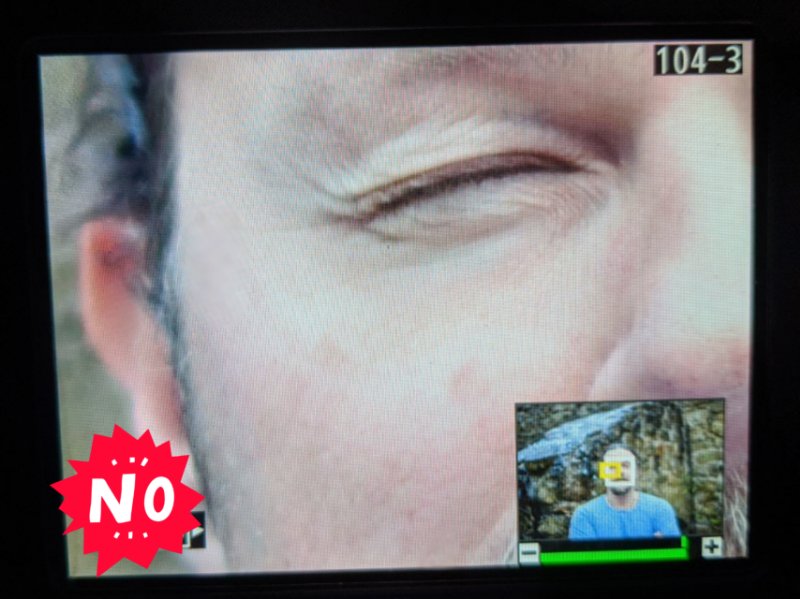
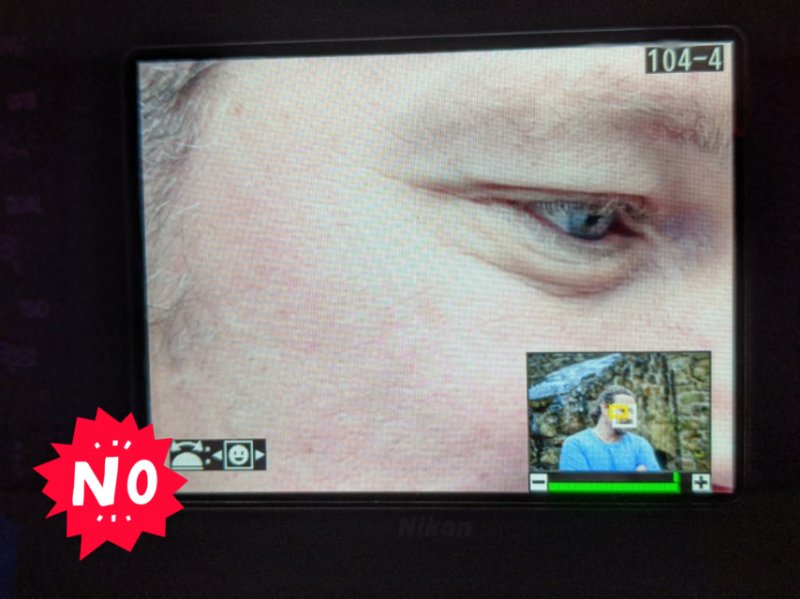
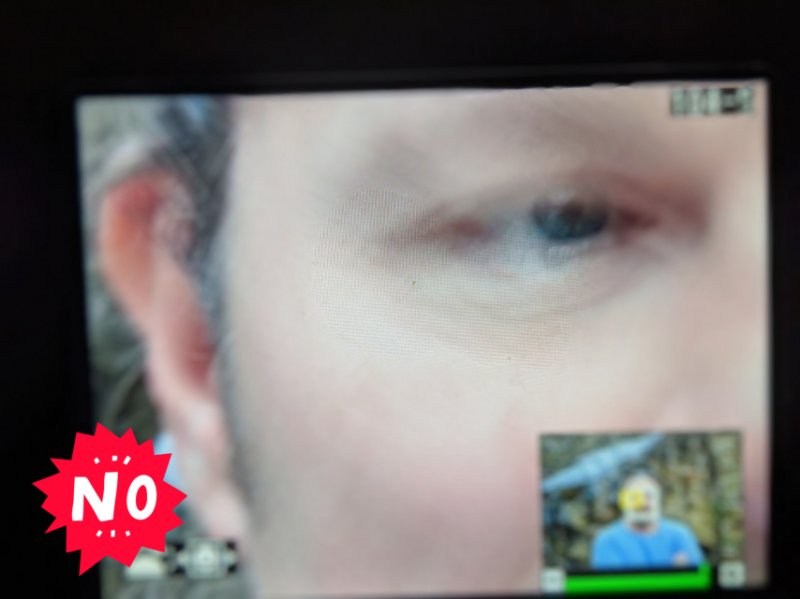
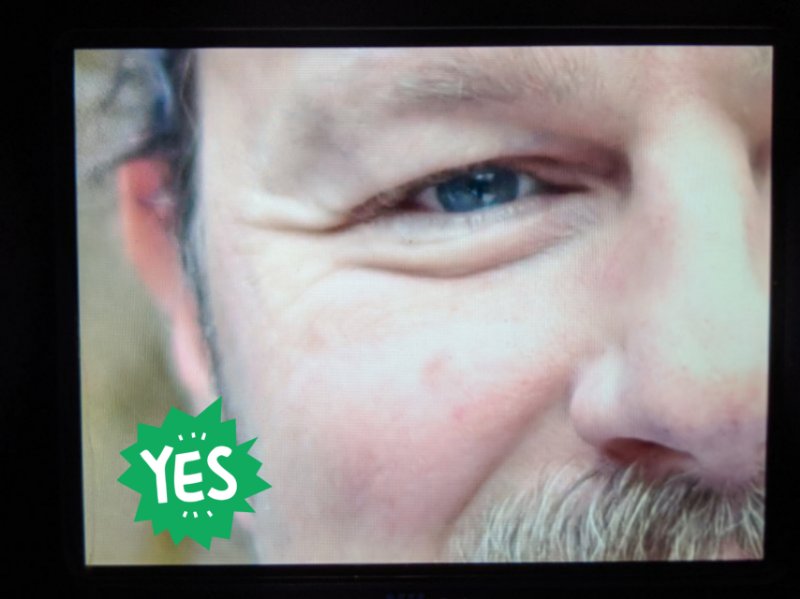
100% zoom is your friend. Use it in combination with easy scrolling to weed out any obvious duds. Look for sharp eyes, open eyes, no unwanted motion blur, overcropping (a missing foot or arm), good composition and faces actually facing the camera.

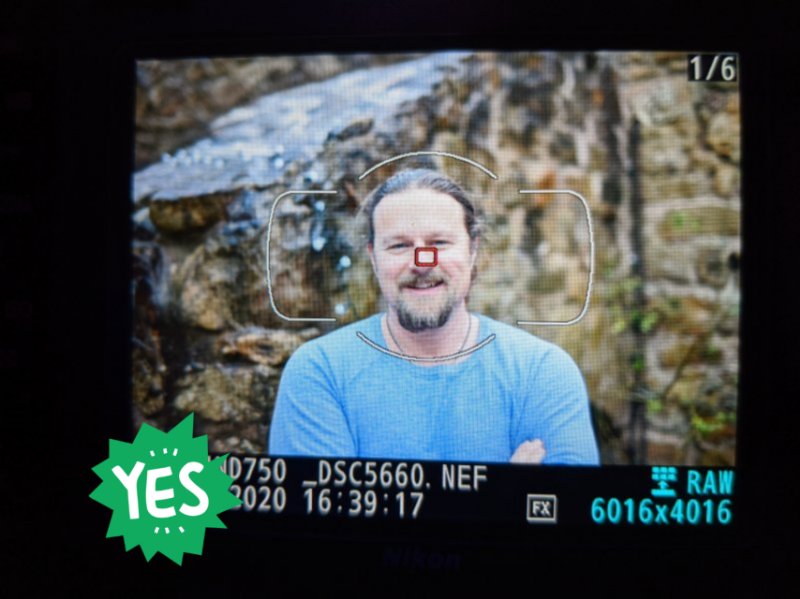
Lock the good photos to narrow down to 1-2 photos for each subject/scene.

Delete all” to quickly weed out the unwanted shots. This will delete all unprotected photos leaving you with only the good ones. I aim to delete half of the photos in my first pass. I sometimes do a second pass to delete another half.

Do not use the format function as this will also delete the protected photos!

One downside with this workflow is the larger battery drain since the screen is on for a long period of time.

Well done! Now you only have a quarter of photos to transfer to your computer and further work on in Lightroom!

The definitive upgrade-to-Nikon-D200 review

d200 dslrThe Nikon D70 was my first digital single lens reflex (DSLR) camera.
The D70 was a “downgrade” from my previous Canon EOS 5 in terms of freedom of expression but it was an upgrade in terms of photo quality (some would argue this) and time delay from taking a shot to publishing it online (this is obvious).
After 1.5 years with the D70 I felt I was happy with the results of my new digital work flow and wanted a DSLR that allowed for a bigger technical elbow room.
Meanwhile slightly better models (D70s, D80) had been introduced by Nikon but I felt only the D200 was a significantly more advanced DSLR worth aiming for. The various D1 models were of course too expensive and too professional for my “happy snapping”.
The first thing I noticed while holding the shiny new D200 was the difference in size, weight and build quality. The D200 weighs 35% more (920g vs 680g), has a slightly larger frame and a metal body (D70 is plastic).
Initially your arm will suffer from the extra bulk of the D200 and you will intimidate your subject more easily.
Another thing my wife noticed right away was the lack of scene modes. While the D70 has a few modes for the most common photo situations (sport, beach, portrait, flower and etc.) the D200 lacks them. On the D200 you have to know which camera features to adjust to achieve the same result.
For portraits, aperture priority mode may be used to minimize depth of field, during sports shots you may want to use shutter speed priority with an appropriate speed, photographs of mountains may benefit from manual focus on infinity and so on.
The shooting speed is greatly improved. While I barely managed to get out 2-2.5 RAW NEF frames per second with the D70, the D200 manages up to 5. The shooting speed is dependant on several other factors like shutter speed, memory card quality and resolution but the D200 “feels” at least twice as fast.
The D200 has an overwhelming amount of detailed settings to alter capture properties (saturation, exposure and etc.), button assignments and much more.
It is a bit overwhelming in the beginning but once you know your way around the menus, then all this flexibility will give you a lot of freedom to create unique photographs. The D200 has four setting memories that allow you to swap quickly between favourite groups of settings.
Other notable D200 benefits would be larger view finder and LCD (2.5″ vs 1.8″), multi-channel histograms (YRGB), more autofocus zones (11 vs 5), better resolution (10.2MP vs 6.1MP) and more.
The only thing I miss from my D70 is being able to use the lightweight IR remote control (ML-L3). I used the remote control heavily during night shots (mirror lock-up mode). There is a cord remote available for the D200 (MC-30 or MC-36) but it isn’t as convenient as the ML-L3 was.
My wife finds it more difficult getting sharp photos with the D200 and I suspect this is because the D200 has higher resolution and is overall more sensitive.
This means that some (novice) users may have to practise their techniques (light shutter finger, holding their breath, pan with subject, support arm on something steady and etc.) to get great shots.
With all this flexibility and complexity of the D200 I continuously keep improving my shots. This entry will be a living document where I will be adding any new D200 tricks, tips and techniques I discover and find helpful. Bookmark it and come back for any updates!
1. I often find my self taking several (2-10) shots of the same subject and scene. Afterwards I browse through the shots and eliminate any that are obviously bad (blurry, bad exposure, bad crop).
A great way to do this is to assign the centre of the navigational dial as high zoom and further assign the back command dial to browse between photos.
When you want to review a series of shots, hit the new convenient zoom button and use the command dial to switch between next and previous shots. Because the focus point remains the same while you browse photos, you can now easily compare a subject between multiple shots even if the subject is off centre.
2. I have programmed the front user button to focus. Sometimes I have pushed the shutter button half way but the subject moves and I need to re-focus quickly without loosing exposure lock and composition.
3. I use Vivid colour mode and 1 step of extra sharpness which I find results in photos that require very little post processing and just POP.
4. The auto ISO function is well thought out because you can program it both for the lowest shutter speed you are comfortable with (I use 1/30s) and the highest ISO you are comfortable with (I use 400).
Then you can be sure that the camera will not use a higher ISO for a shot if the exposure can be achieved with or above the shutter speed you have selected.

I went to Beachy Head, UK

…and all I got was this photograph of a wigged rock.
N 50°44’32.701″, E 0°12’2.923″
Last Saturday was a very sunny – albeit windy – day and ideal for taking nature photographs.
I used Google Earth to find a few picturesque locations in the South East of England. Panoramio.com then provided a layer with geo-tagged photographs submitted by online users which gave me an idea of interesting subjects in the ara.
Sunday came one day later and brought with in non-stop rain. Ideal for organising photographs and (digiatally) developing a few of them.

Rainy Brighton

One of the things I have been missing lately is to be out for a whole day looking for photo opportunities.
At the moment I have a bit more spare time on my hands now that my wife is in Brazil for work (she took our little one with her). So last Sunday I finally got a chance for photography while on a day trip to Brighton, England.
That day I was met with typical South East England weather: heavy rain, sunshine and strong winds changing every 40 minutes.
brighton seaside and rain1/320s F/5.6, 20mm F/2.8
During one of these heavy rains I took shelter under the Madeira Drive arcade. The sun was shining from far West and because it was getting late the sun was characteristically yellow.

Heavenly light in Scotland

heavenly-light-in-scotland.jpg
I often find it difficult catching an optical phenomenon on film (or on digital memory more recently).
Just like me, you probably pull out your camera when you see that gorgeous rainbow, sunset, aurora borealis or reflection on water. More often than not it comes out nothing like it was in real life.
The other day I saw some wonderful sunlight beaming down through a narrow opening in the clouds. To my surprise the captured version creates same amazement as the real thing did.
The tiny head in the bottom right corner is the top of a statue.
As always there are plenty more photos from Scotland in the Photo Gallery.

Torino 2006 Olympic figure skating photographs

figure-skating.jpg
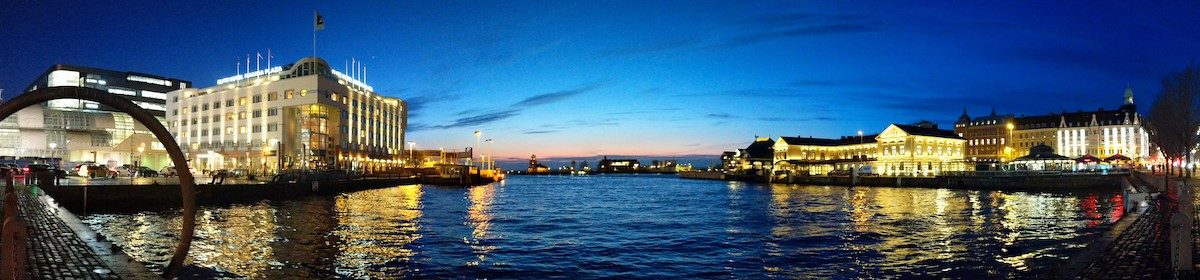
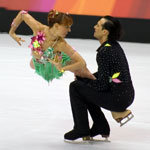
Last week we attended two evenings in the figure skating competition at the Torino 2006 Olympics.
(cut the talking and just show me the photos will you)
This was a nice opportunity to snap away with a big zoom lens and gave me a first hand experience in what I think can be called (amateur) photo journalism.
This included the taking and managing of a large amount of photos and finding an efficient RAW workflow.
During each evening there were 25 couples on the ice. On average I shot 10-15 photos of each couple. Using the built in LCD, I then quickly checked the photos and erased the obviously bad ones. This got it down to 4-6 photos per couple.
I can only fit 180 raw shots on the 1 GB compact flash (CF) memory card I use so the erasing of bad shots in between skating couples was necessary.
The equipment I used was a Nikon D70 (digital SLR) and a Sigma 70-300 mm (100-450 35mm equivalent) zoom lens.
The camera model is a fairly sophisticated SLR and includes some of the required features: shutter speed priority metering mode, continuous focus and continuous shooting mode.
Usually I can get steady shots at 1/30s using a 35mm lens but with the 300mm lens I could not go below 1/180s. Once I had noticed this, I locked the camera’s shutter on 1/180s.
This created many underexposed shots but it was only by .5 to 1 step underexposed and I knew I could compensate for this since I was working with raw images.
If I have to choose between blurred images due to camera shake and 0.5 step underexposure, I choose the underexposure any day.
With continuous focus I could follow the subject and the camera kept re-focusing continuously.
One drawback with the D70 is that it doesn’t have eye controlled focus. This forced me to keep the subject in the very middle where the camera focuses in order to stay in focus while in continuous focus mode.
On my older EOS-5 one can position the subject off center but by looking at it in the camera view finder, the camera keeps focusing on the subject.
The lifts were in my opinion the most beautiful and breathtaking part of the performances. In order not to miss any action shot, I let the camera fire 3 shots in quick succession during the lifts.
To travel light, I had not packed the camera battery charger with me. As the days progressed, I kept wondering when the battery would give in.
It did so after 5 days of shooting and after more than 370 shots. This included frequent use of the LCD screen and I find that impressive.
Back at home I was first overwhelmed with the large amount of photos. It took me a few days to summon the strength to start sorting through them.
With a large cup of tea next to me I started by viewing the photos on a large monitor and assigning a score between 0 and 5 to each one. At the same time I deleted the ones that were too blurry.
Several cups of tea later I could finally filter for photographs with a score of 3 or higher.
Had the project required more photographs I might have included score 2 as well. Had the project required just the best of the best, I would have only included photos with a score of 5.
At the moment I find this to be the best method to control a large collection of photos.
I then soldiered on by adjusting the white balances (mainly a batch process to majority of the photos since they all were from same light conditions) and exposure compensation.
figure-skating2.jpg
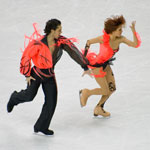
Normally I try to present photos just as they are captured without added cropping. This requires composing the image in the camera viewer as much as possible at the moment of capture.
However due to the fast nature of figure skating, a 450mm lens and awkward spectator seats the photo compositions were all over the place.
So my last step was to reposition and crop each photo individually. I made sure to stay with the 3:2 proportions of my camera.
If you are up for it, there are many, many more photographs in the Torino 2006 Olympic figure skating photo gallery. View slideshow, delay 1 or 3 seconds, max size: no limit.
It was a lot of work but a great experience.
Update 2006-03-07
A here is the professional version of photo journalism (via Kottke).

Digital Black and White Beach

digital black and white sea urchin
Converting to digital SLR was great fun but I was missing black and white photography.
I quickly discovered that digital black and white is not achieved by converting digital colour images to grayscale; this only resulted in bland, contrast-less photos.
1 year on and having played with colour channels, curves and blending of layers I am starting to get somewhere. Hopefully I will get a chance to sum it all up in a future post.
For a few more photos in this beach series, see the digital black and white photography album.

Panning in the park

Camera panning is a technique where you select a slow shutter speed, track a point on your moving subject and press the shutter release geeently.
If all goes well you will have photo with a blurred background and a subject that is relatively sharp which makes it stand out.
Panning is the ideal way of capturing a sense of motion in a photograph.
Getting the correct shutter speed is tricky because it depends on the speed of subject, distance to subject and the focal length (zoom) used.
If you do select a slow shutter speed but keep the camera still then the subject will be blurred just as the background and not be very distinguishable.
If you select a fast shutter speed then all of the image will be frozen in time and look as if motionless.
Having a digital camera helps immensely because you can check the results after each shot and adjust accordingly. You can also snap away and select that one gem in the comfort of your home and your favourite RAW image editing software.
Below are some photos from one fine sunny Autumn day in the park with a few dogs. The first photos are quite abstract because the shutter speed was too slow.
The last photo is kind of OK.
camera panning

1/8s @ 105mm (35mm eq.)
camera panning

1/15s @ 105mm (35mm eq.)
camera panning

1/4s @ 105mm (35mm eq.)
camera panning

1/30s @ 105mm (35mm eq.)
Now get out there and snap!

More photographs of golden retriever puppies than you can shake a stick at

Golden retriever puppies Golden retriever puppies

And there are plenty more photos in the gallery of Golden Retriever puppies photographs.

A few of them are still available for sale. If you live in or nearby London and would be an exemplary owner, do contact me! Not anymore

Sunset over the River Thames

thames river sunsetNikon D70, Nikkor 20mm 2.8D, f/8, 1/60s

On my way back from a recent run I couldn’t help noticing how wonderful the evening sky was over the River Thames.
So I prolonged the late jog by rushing home, grabbing my camera and snapping away.
The camera was only hand held which resulted in a little blurred shot but nothing noticeable at web resolution only.