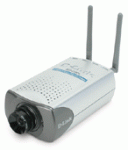
 D-Link DCS-2100+ is a WiFi enabled web camera with a built in web server, FTP and mail sending functionality.
This means it can “easily” be connected to an existing wireless network (WLAN) and only needs a near by power outlet to be connected. The built in web server makes it fully functional on its own, not requiring a PC to be on constantly.
The setup is fairly straight forward. Connect the camera with the supplied network cable to a router. Set up the wireless parameters such as IP address, SSID and WEP encryption.
Unplug the network cable, power cycle the camera and it should connect to your WLAN. In theory. In practice you may have some connectivity issues, as always with WiFi.
It wasn’t mentioned ANYWHERE but the camera works only with a broadcasted SSID. I figured this out the hard way, only being able to connect after many, many trials of various setups on the camera and my router. Not too happy about this fact because of all the exploit possibilities of WEP but I am hoping that a future firmware release will fix this issue.
The camera has a web interface that will let you modify everything you need. First thing will be to create some user accounts that will be able to view video from the camera but not be able to access the setup.
The FTP functionality lets you upload a snapshot to a web server in arbitrary intervals. If you instead prefer to be emailed with a snapshot as an attachment just enter an SMTP server and email address. The latest firmware supports SMTP authorisation if your SMTP server requires that. It doesn’t seem to be possible to both FTP and send email.
When you connect first time to the web camera you will be asked to download 1-2 ActiveX components to be able to view streaming video and audio. This works very well in IE on Windows but any other browser or OS is not supported.
Once connected, you have the choice between UDP, TCP and HTTP connection. UDP results in best quality but may be blocked by corporate firewalls. HTTP is video only but should work even if behind a firewall.
The camera comes with a IP surveillance software that is run from a PC. It supports up to 20 (!) cameras if you are interested in a thorough CCTV solution.
Motion detection is a feature with great potential but I found it too complex to set up and not working very well anyway. In theory, you should be able to receive an email with attachment when motion is detected.
Via the web interface you can adjust standard video settings like video quality, white balance, image size, brightness and etc.
There are many smaller enhancements I’d like to see in future firmware releases. A separate SMTP and FTP functionality. Better motion detection setup. HTTPS support for administrative functions. Cross browser compatible connectivity. Support of non-broadcasted SSID. Leaner user interface.
+
Wireless
No PC required
Sound
Included monitoring software
–
Broadcasted SSID required
Complicated motion detection setup
Supports IE only

Example image from the camera (the page is a custom page made by me).
Update
Comments have been closed, Please use the DLink DCS-2100+ Internet Camera forum for any questions / feedback.
Category: Gadgets
Linksys WAG54G 802.11g ADSL Modem VPN Router

Hello you world of wireless fun. Here I am, please take me in with open arms. I have been a believer for a long time but never really got around getting the right equipment. Now I have.
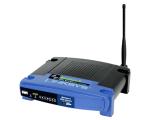
The Linksys WAG54G is a handy 4-in-one device for an ideal home broadband and wireless solution. The device is full of features
With the built-in ADSL modem the device connects to broadband Internet. The device comes with a micro filter and a phone cable so it’s all in the box, ready to run.
The device has a router with 4 switched ports to let you connect PC, laptops, printers and etc. via network cables. All computers connected to the router will be able to shares resources creating a home network. By plugging in additional hubs you can create as large network as needed. Of course, all computers will have access to the broadband connection.
The 802.11g (WiFi) access point lets you connect wirelessly from other devices. The g standard supports speeds of up 54Mbps and is backward compatible with the older b standard in case you have any such devices. The access point supports 128-bit WEP encryption and MAC address access list making it decently secure.
To complete the picture there is a firewall to fend off any hack attempts. The firewall is configurable for port forwarding and DMZ if you need more control over what services would be available inside your network. An extra security is time based access control. With this feature you can limit certain devices (like your child’s PC) to access the Internet only during certain hours.
The Linksys WAG54G can be set up to create a VPN connection to a VPN server. This is ideal If you are working from home and need to connect to your office. All devices inside the Linksys will automatically be able to access the LAN at work.
Included in the box is one network cable so that you can set up the device and start using it straight away. Connect to http://192.168.1.1, browse through all the settings and set them accordingly.
ADSL setup: account, password and ADSL parameters
WiFi: change SSID, turn off broadcast, turn on WEP 128-bit encryption, set up a MAC access list
Change the administrator name and password
Takes around 15 minutes and is very straight forward. The Linksys WAG54G can be purchased for just above £100.
Update 15/02/04
The newest firmware update from Linksys corrects incorrect system time and adds WPA security. Definitely a must.
Check out the the Linksys WAG54G forum.
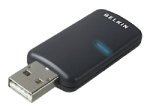
Belkin F8T003 Bluetooth USB adapter
 After recently moving to a Sony VAIO without IrD I needed a Bluetooth adapter to be able to continue synchronising my mobile phone and being able to access the Internet on the move.
An USB adapter is an elegant solution due to its small form factor. It will let you communicate with your Bluetooth device securely and without any wires.
How to connect your Plasma TV
A plasma screen is really a computer screen and thus not as easy to connect to your video units as a traditional TV. After a lot of researching and browsing and asking, below I have summarised how to do it.
Ranging from lowest quality to highest these are various video signals that a Plasma TV should handle. Since you have invested in an expensive TV you should really try to use RGB quality or above:
- Aerial antenna.
- Composite video. Usually one single cable with yellow connectors
- S-video lead. Is usually a black lead that actually carries the video information on two separate leads.
- RGB SCART. Carries the information on 3 separate leads (red, green, blue).
- (Progressive) Component video. Also carries the video on 3 separate leads but has more bandwidth for the signal due to better use of colour space.
- DVI. Digital video from a computer
#PAGEBREAK#
Just do it
- Identify which of your video devices can do RGB out. Your digital TV, sky digital, DVD player, PlayStation 2 and Xbox should be able to do this. Your VCR will not
- Get enough SCART leads that are fully wired to support RGB and connect the devices to each other, resulting in one SCART
- Get the RGB to Plasma VGA converter form The Media Factory. This will convert your SCART contact to a VGA contact with correct synchronisation signal that your Plasma TV needs. Expect a cost of £125
- Get a good quality VGA lead. Around £50
- Connect the devices that do not support RGB with S-video or composite in the worst case
- Use a cheap SCART switcher if some devices lack a second SCART socket
Theoretically you should be able to us a SCART-to-3 or 5 leads converter and plug this into your Plasma TV. The problem is that Plasma TVs require a stronger synchronisation signal than most SCART carry so even if you find a Scart-to-5-RCA lead it does not guarantee success.
#PAGEBREAK#
My case
One progressive DVD player that connects straight to the Plasmas BNC contacts. Playstation 2 via Sky and a second satellite receiver to a SCART switcher, via the above mentioned RGB to VGA converter and then to Plasmas VGA contact. Composite and S-video leads connected to a video switching amplifier for easy connecting of portable video sources, e.g. camcorder and digital camera.
Update 28/01/04
The comments are now closed. Please post any new questions in the forum.
Sony Ericsson HBH-35 vs HBH-60
Sony Ericsson HBH-35 HBH-60 blue tooth mobile phone
Pioneer 433MXE plasma TV
How about a flat, skinny, 43″, high-resolution TV? If this is your vice then a plasma TV is your medicine.


