 My Macbook Pro ground to a halt after 6 months of heavy usage.
It started to freeze up frequently preventing it to load anything from the hard drive. Things that already were in memory continued working but accessing anything from the hard drive or unlocking the screen saver took up to 2 minutes. Not even “ls -l” worked.
A quick visit to the Genius Bar and after running many hardware diagnostics test it was diagnosed as a software error. They weren’t sure whether it was a problem just with the user account or whether it was in the system so the recommendation was to reinstall OSX.
Since OS X Lion (10.7) was out I thought I might as well install that rather then re-installing Snow Leopard (10.6).
Call me old fashioned but I don’t trust OS installations over older OS installations. I prefer fresh installs from removable media so I starting looking for a method to install OS X Lion from fresh but it wasn’t as easy as it should be!
By installing the OS X Lion on a new partition on the hard drive I was able to keep all my documents and application and move them across when needed.
What you need:
- OS X Lion installer (purchased from Apple store)
- An empty recordable DVD (it may be possible to install Lion from USB but I haven’t tried that)
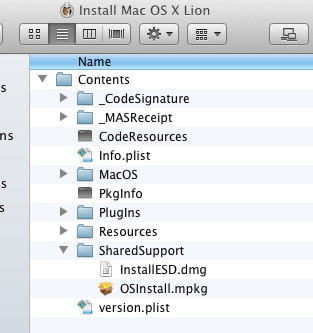
First you need to create a start-up DVD from the OS X Lion installer. The trick is to find “InstallESD.dmg” inside the Lion installer. You can navigate items inside the installer by choosing “Show package contents”.
WARNING: The OS X Lion installer is deleted after you have installed Lion so make a back-up copy of it for future use!
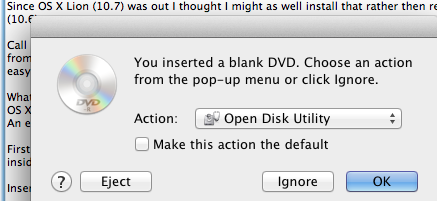
Insert the blank DVD and choose to start Disc utility.
Drag InstallESD.dmg to left-hand side of the Disc Utility, select the newly added InstallESD.dmg and hit Burn (and Burn again). It will take around 10 minutes to burn and verify the DVD.
Time to restart your Mac. Hold down Alt (Option) when booting to be presented with what media to boot from. The DVD should be visible after a short spin-up of the drive.
You can choose to install OS X Lion over your older version but this will delete all your files and applications. Instead you may want to consider keeping your old installation and install Lion onto a new partition.
Once booted into the Lion installer, don’t click continue but rather select Disc Utility from the top bar. Shrink your old partition to minimum possible, create a new partition in the newly created space and continue with the OS X Lion installation into that partition.
The installtion takes a good 30 minutes but once you have re-started and logged into Lion, your old partition is visible and you can copy items from it.
If you were using File Vault to encrypt your documents you have to navigate to /Users/<user name>, show content, double click on “sparsebundle”.
You will be asked for your original password and it will be mounted as a new image. You now have access to your old documents and application settings.
Most application you can simply drag from /Applications on the old partition but first copy the application settings (bookmarks, settings, accounts, passwords and etc). There are two places where the old application settings live:
<user home>/Library/Application Support/<application name>
<user home>/.<application name>
You need to show hidden files for this. You can enable hidden files by entering the following in a terminal window:
defaults write com.apple.Finder AppleShowAllFiles YES
Good luck and enjoy a clean install of OS X Lion (10.7)

 The
The